LOVE

V057

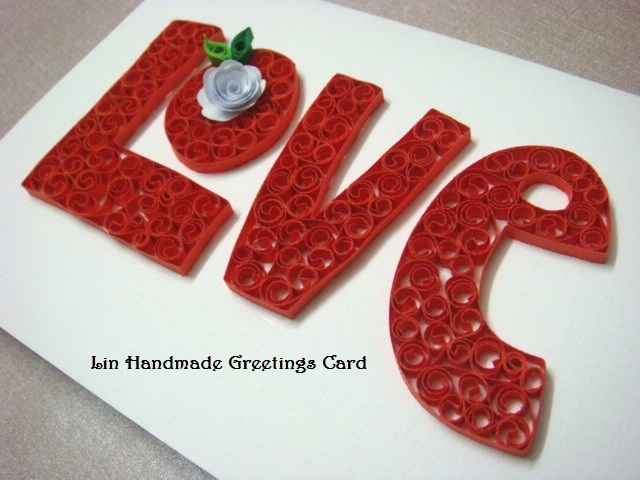
Finally the card is done! I can't believe I did two things that I've never done before in one card ;). Yup! One is the quilled alphabets and the other is the pop up heart. I have often wondered and was pretty intimidated to try out these two things before but I somehow got the courage to try them out in the end and I must say, I'm pretty happy about how they turned out even though the design is pretty simple :).

The pop up heart template was given to me by my dear friend CC Peyton......she found the free template online.......I kept it for months in my computer.....never printed it, never dared to give it a try.....until now. Thanks CC....I love it!! Although it was a bit difficult to make.....but I made it, with you in mind....I knew you would love to see me make it. So, dear friend, this one is for you ;).

Hopefully this is just a starting point for me to create more quilled alphabets in future......IF time permits me to do so that is! haha! Never seem to have enough time to make handmade cards these days.....too busy with other work and commitments. So indeed it was really nice to be able to make this card even though I didn't have a lot of time to make it.....

I made a video of the card so that you can see it at a closer view...... do check it out ;)


Quilling LOVE


I've never done anything like this before. This is my first time trying to quill shapes of alphabets that I drew myself. Just a simple drawing......and I drew the alphabets pretty big so that it will be easy for me to quill it ;). I'm not that ambitious yet to try quilling complicated type of alphabets/fonts that might sprain or twist my fingers ahahaha. So I opted for something less complicated and will give me the freedom to create the alphabets anyhow I like them to be since I'm pretty new at this technique.

Since I don't have anybody to teach me how to do it, I searched in YouTube for any kind of video tutorials on how to do a simple quilled alphabet and I found one that I think is easy enough for me to try. There was only one video that I found and it showed how to do it using a polystyrene foam and pins. But since I am pretty lazy to do it exactly the way the video showed it, I decided to change it a bit and do it the way I'm comfortable with. 

I didn't use a thick quilling strip......just a 80gsm shredded quilling paper. Since this is my first try, I thought of using something that is not that thick and easy to shape....just testing and experimenting first. Once I get the hang of it then perhaps I can try some other types of paper.

The whole thing is not yet completed.......I still need to decorate it with some quilled shapes to make it look pretty....otherwise it looks so empty. Hopefully I will be able to get it done by tomorrow so that I can blog about it......till then!!! ;)


Pink and peach

BM020A


BM020B

Finally I managed to get these bookmarks done this month! I was afraid I would miss my deadline. This was ordered from me months ago and even this was something I find it difficult to get done because of my busy schedule. But I did it! Yay!

The design of the bookmark is actually an old design of mine that my customer was interested in....which is the BM020 bookmark. But she wanted me to choose the colour combination myself and it had to be sweet and cheerful looking and this was what I came up with. I think the colours that I chose were sweet :). As sweet as the person receiving it I hope hehe! :)

The names and stars were hand carved by the way......no craft punch or die cut machine was involved in the process :).


13


It's been while since I last made any bookmarks such as these.....especially with names engraved at the back of it. It's rather time consuming and takes a lot of patience to make. I still have two more of these to make for another customer. Hope to be able to blog about that one in a day or two. :) Sorry the photos are not that clear......took them in a rush...but you can view them up close at the slide show below this post.

My customer ordered 13 bookmarks for her colleagues and one for herself. She's moving to another company soon so these bookmarks are like farewell gifts for her dear colleagues. She was interested in two of my bookmark designs.....one was the BM006 and the other was the BM008. So the bookmarks were done using those designs but the colours vary from one another. I've never had to do so many colours at the same time! Phew! Luckily I had all the colours of paper and ribbons to make these bookmarks hehe! 


First time for me to do the name in two colours.....usually it's just one single colour. It was and interesting try since my customer wanted the colour for her own bookmark to be in pink and purple. :)


A new winner

A new winner has been selected for the May 2012 Blog Giveaway. This is because the first winner did not claim her prize for more than a week now. I decided to choose another winner instead of waiting and waiting and waiting for the first winner to respond.

The lucky winner is :
  NO. 19 (Mummy Chenta from My TTC Journey)

I hope this second winner will respond too, if not then I'll just give it away to whom ever I prefer :). Do email me your complete details so that I can post the prize to you as soon as possible. Thanks! :)


Forever love

V056

I'm pretty excited about this iris folding heart I made for this card. First time for me to make something like this. I did made one iris folding heart shape similar to this one at first but the pattern inside the heart is a little different. There were only 3 types of ribbons used instead of 4. I wanted so much to use 4 because I wanted a plain ribbon to match each pattern ribbon. One red ribbon for the red heart ribbon and one pink ribbon for the pink heart ribbon.

Another reason for me to be excited is because I get to use another new craft punch from MS which is the MS Vintage Heart (punch around the page) craft punch. I love experimenting with it and see what I can come up with using both of the Vintage Heart punch. I love using the corner punch especially to make heart shapes! It's perfect as a gift tag or simply as decoration. ;)

I'm giving this one away for June 2012 Blog Giveaway.........hmmmmmm I wonder who will be the lucky winner ;) <3


June 2012 Blog Giveaway


Hello everyone!

It is now time for giveaway number 6! Oh my......it's already June! Every time a new month arrives, I'm always surprised at how time flies so quickly.

This time around, I had the opportunity to make something for my loyal readers. It's a half A4 size love theme card that I made using my the Iris Folding technique. But instead of using paper, I used ribbons instead because I just love how it looks when using ribbons. I will post a more details regarding the card soon in another post so that you will have a clearer look at the card. Hope you like it ;).

It's pretty easy to enter this giveaway. Everyone is eligible to enter it. Please read the instructions carefully:

1. "LIKE" my Facebook Fan Page at the link HERE or "Follow" my blog at the followers box at the side bar of my blog.
2. Write your name and your URL link (your blog link or FB link) at Mr. Linky's widget below.

This giveaway runs from today till 11.59pm on 3oth of June 2012. I shall announce the name of the lucky winner during the first week of July.


JUNE 2012 BLOG GIVEAWAY IS NOW CLOSED


Purple and green parcel

HB103

I tried making another iris folding pattern but this time it's a square shape. I found the template via online on google images. There's lots of free iris folding templates that we can download and try out. This particular one seem easy enough to try and I loved how it turned out. This time I used a bigger sized ribbon since the template is quite big. 

I still have not yet tried using folded paper because I'm just super lazy ahahahaha. Using ribbons is faster. :D Besides, I have tons of ribbons that I can use for my iris folding experiments ehehehe! 

I used the iris folding pattern to make another birthday parcel....since it's bigger than the previous parcel I've made before, I had to redraw the ribbon on top of the parcel for this one. I'm not too happy with it, perhaps next time I'll draw a much better one hehe.

I also tried using the MS doily punch that I recently bought to make the bottom decoration of the card. I love that craft punch design so much. :) Actually the envelope is soft olive green in colour......so is the colour of the green ribbon.....but because of the lighting, the colour does not really show in the photos huhu.....


Winner fo May 2012 Blog Giveaway


And the winner for the May 2012 Blog Giveaway is................. lucky number 134! ;) Congratulations to Miss Nadratul Syazwana for winning the giveaway :) Do email me your complete mailing details and contact number as soon as you can! ;)

Participants for Lin Handmade Greetings Card May 2012 Blog Giveaway were 206 altogether at Mr Linky....Thank you so much to all who took the time to enter my blog giveaway and helped promote it at your blogs and Facebook. I really appreciate it very much. 

I have already prepared another gift for June 2012 Blog Giveaway. It's a little different from what I've done before...something I made myself while I was on leave. Do check out the next giveaway that's coming soon!!  


Ruffled ribbons

V055

Ribbons, ribbons and more ribbons! Combinations of ruffled ribbons and love theme pattern ribbons in one card. I love how I can make use of the ribbons I have and embellished the card with them this way. I made this card while I was on leave. Got the idea when I was watching one YouTube video of how to make the ruffled ribbons without having to sew it. It was so cool, I had to give it a try just for fun ;).

I didn't put any wordings on it yet. Haven't decided whether to put or not. I seem to like it just the way it is. Using ribbons as embellishments is probably one of the simplest ways to decorate a card. Another would be to use wrapping paper or pattern paper. I just love looking at the texture the ribbons can make by making it ruffle like that. Gives it dimension and character. :)


Featured Post

How to make two tone tear drop shape quilling flowers

We are coming close to mid February and I'm blogging about something that I did last January! LOL! It's been a month sin...